
I play enough with cell phones. Currently I'm investing in equipment to do more than open an iPhone to replace battery or set Touch + Screen.
Had it in my hands not long ago a cell phone Samsung Galaxy Ace model GT-S5830C. I played a lot with him flashing ROMs and I taught my teenage son to do the basics and the phone ended up with him.
One day he came to tell me that there was flashed a wrong in the device ROM and that was no longer able to enter the download mode, necessary to rewrite the system in case of corrupted ROM or update errors.
Looks like it was
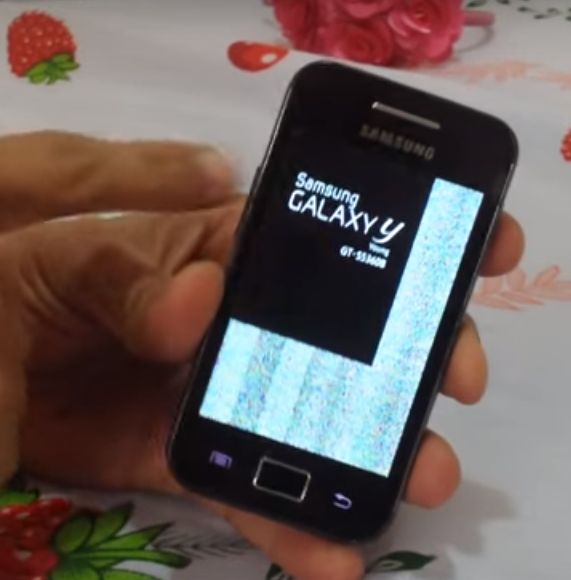
And with this state he wouldn't go in no way in Download Mode.
Then I realized it could only restore this appliance using a resource to enable the download mode using a JIG.
A JIG is a device that warns the phone to go into download mode by sending a signal generated in himself.
You can even access this mode by accident when using a faulty charger or when we use those vehicular Chargers with more than one USB output and call more than one outfit in it.
Virtually all Samsung Galaxy line support this feature.
Going straight to the point
To make the JIG you will need the following items:
- 1 micro USB connector
- 1 resistor of 300 Kohm resistor in series to arrive or to this value.
- soldering Kit (soldering iron + Tin)
It is advisable to use 2 of resistors 150 Kohm or 3 of 100 Kohm to facilitate soldering, because if you use one will have to make a little turn in the legs and this can break during the process especially if you don't have experience with bending of the legs of a resistor.
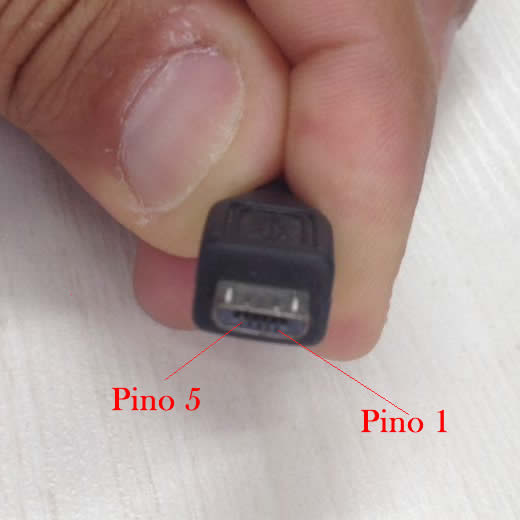
There are several types of micro USB connectors around. Usually the wires are made with a connector that has contacts divided into two sides. You must solder the resistors on the pins 4 and 5 the connector.
To know which pin is each contact you will need a multimeter or some form of check via current.
Looking at the connector with the socket part facing you and the contacts line down you have the pins in sequence 1 the 5 from right to left, as the image below.
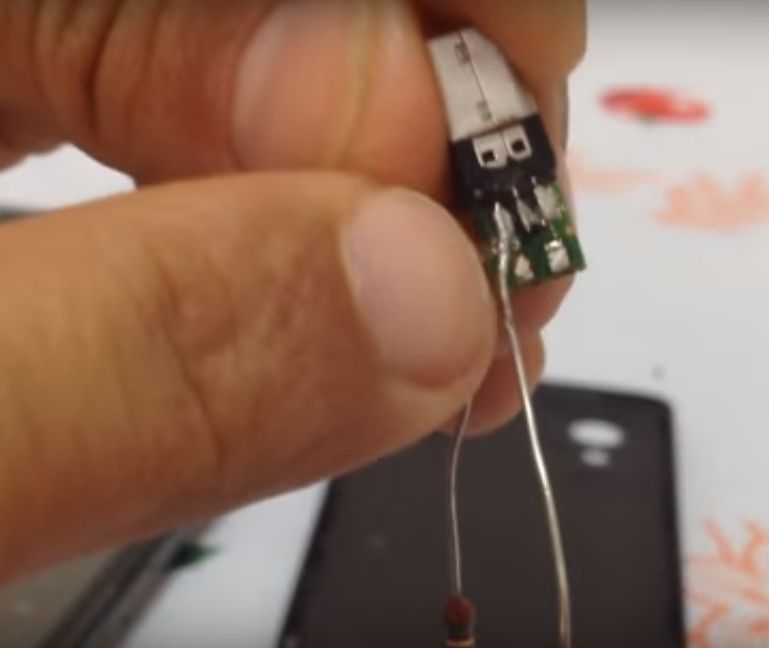
What use in the explanatory video was taken from a Motorola charger. I took the cable and this had a small printed circuit board with pins marked on the Board. It also contained a resistor. Removed the resistor to prevent changes of resistance.
There are some that all contacts are visible side by side. Be sure to find the pins 4 and 5 to solder the resistors.
See the USB JIG coming into action in the video below.
To complete the process of recovery the appliance you must use the following software.
- Samsung USB Drivers
- ODIN
- ROM and patches (If you want the root)
;
Leave a Reply